Δευτέρα 17 Νοεμβρίου 2014

Water Injection & IAT Relocation

This is the final piece (I hope) to the puzzle that is the high IAT's (Intake Temperature) only at the track when on WOT (Wide Open Throttle) for prolonged periods.

After upgrading the existing cooling capabilities of my Chargecooler by adding a bigger water reservoir I came to the conclusion that a Water Injection system was needed for extended track sessions.
Don't get me wrong, just the Chargecooler is more than adequate for street use and mild track sessions..but I want to be able to do longer sessions and also lengthen the safety margin of the engine because atomized water in the engine is a great knock limiter.

Ok, let's get started.I opted for a Snow Performance WI Stage 2 kit with MAF/Boost switch.I will use the Boost function since it is preferred for centrifugal applications such is the Rotrex. I was determined to use the existing windshield washer reservoir as it is in the lowest position possible in front of the passenger's side wheel liner and is rather large (holds almost 5 litres).

You can see it in the picture below:


To remove it you'll need to remove the front bumper and passenger's side headlight.Then you'll need to drill a hole so that the quick release plug can be installed, don't forget to add the goop sealant.You can see in the pictures below the completed reservoir:


The WI pump needs to be close and under the reservoir, so you need a make a mount for it to sit directly under.It is quite easy because you have a lot of mounting options at that position.
Check the pictures, so you can get a general idea..remember that it is wise when adding weight try to position it at the lowest point of the car:

Moving on, i wanted to achieve a stock-ish look and avoid many visible cables so i installed the WI controller inside the glove box.
I drilled three holes for the three wires to pass through:
1) Black wire is ground
2) Green wire connects to the pump
3) Red wire needs 12V power source.
You can cut the Yellow wire since it is used for MAF applications and i will use Boost controlled operation.
Here you can see some pictures of the progression:


A big thumbs up to my buddy Sikrip for helping me out with the wiring, schematics, positioning...pretty much everything.. :p 

To be continued..tomorrow because i have a party to attend to! :) 

Παρασκευή 14 Νοεμβρίου 2014

December Trackday preparations..

I really liked this photo without the front bumper..Getting some stuff organised for the upcoming December Trackday in Serres Racing Circuit! More to follow...

Σάββατο 10 Μαΐου 2014

Dyno Sheets & Fuel Return kit

For future reference I will upload my dyno sheets from various stages of my MR2.
2006, first with the 2zz NA engine:
Exhaust: Stock modified header and a 2.5 inch (63mm) exhaust with Twister Metal Catalyst
ECU:PowerFC tuned by J.P Motis       
Fuel:Stock pump and injectors
     !Will upload it soon!

Moving on to 2009 after the Rotrex kit:
Exhaust: The same as above
ECU: The same, tuned by J.P Motis 
Fuel:Walbro 255 fuel pump, 630cc Siemens Deka Injectors 


2013, Same Exhaust/Intake/Rotrex:
But with the a fuel return kit by Aeromotive plus an Aeromotive 340l/h pump.            
Needed to retune completely the fuel maps.Tuned by me.
The reason of adding of a fuel return kit on a returnless stock system is because of the reduction in fuel pressure that happens when you positive pressure the lines with a turbo/supercharger.
Example:Let's say that your stock fuel pressure is set at 45 psi.
When NA, fuel pressure stays at that level throughout the rev range.When you add a compressor/turbo and run 10psi at redline (8000rpm) your actual fuel pressure at 8000 will be exactly 35psi(45-10).
To overcome this you need to push your injectors in a higher DC to overcome the drop in fuel pressure so to keep the desired AFR.
This adds a lot more stress to your fuel injectors (DC cycle at almost 99%).
Now that I have fuel return kit base fuel pressure is set at 45 psi and stays there throughout the rev range.This has brought down the Duty Cycle of the injectors to a safe 70%.

 In these pictures you can see my current fuel setup:Aeromotive 340l/hr pump, Aeromotive Fuel Return kit,Radium fuel rail, Siemens Deka 630cc/min injectors.

Κυριακή 27 Απριλίου 2014

Full Intake Cleaning

 Since I took the Rotrex kit apart to change the Unit's impeller, I took the time to thoroughly clean all intake parts..

 I used brake cleaner spray for the Intake Manifold and the Throttle body..The IM was in a good shape with not much gunk to clean on the inside.On the other hand the Throttle Body needed a bit more work to bring it in the immaculate state you see in the pictures. 

 I used Contact Spray(No residue) for the Supra MAF and other electrical contacts on the Throttle Body.The small wires inside the MAF were black and ended with a silver-ish finish like they're supposed to.You can see it in the zoomed picture.

 I continued with the Intercooler (Chargecooler) for my Water Intercooler setup.For this part I used gasoline.Filled the air pockets with it, shook and emptied..several times.In the last picture you can see the IACV (Idle Air Control Valve) from the TB side.I used also brake cleaner for this part.For all the silicones tubes I used soapy water and called it a day.

 Lastly you can also see the Hondata Intake Manifold Gasket for added heat dissipation between the block and the IM. 

Πέμπτη 17 Απριλίου 2014

Yokohama Advan A005 WTCC Volk Rota Wheels

I came across a good deal on a set of Yokohama Advan A005 WTCC Slicks 240/610-17.I got them from PB Motorsport in Athens.

I will run a square setup, the tires are like 245/35-17 in normal size so I will have no problem with rubbing in the rear..a slight roll in the front might be necessary.

I already had two Volk TE37 17x7.5 et40 that I will use in the front.Since Volk doesn't make a 17x9 in 4x100 bolt pattern I went with white Rota Grid et45 to match the front wheels.

The front wheel/tire combo came out at 15.1 kg, pretty impressive.

The rear combo weighed 17.1 kg which is fine,considering it is a 9 inch wheel.

In the last pictures you can see the difference of the same tire mounted on a 7.5 inch wheel and a 9 inch wheel.

Τρίτη 15 Απριλίου 2014

Mocal Oil Cooler Installed

After having a small oil cooler (13 row 115mm matrix) at the side vent and seeing that it is inadequate for track duty (after 3 laps oil temperature would go as high as 125 Celsius) I decided to double the volume of the oil cooler with a Mocal 13 row 235mm matrix oil cooler.
Also, I used a thermostatic sandwich plate meaning that until 80 degrees Celsius oil will not go through the cooler, which helps especially on cold starts in the winter.

Testing of the oil temperature difference regarding the two oil coolers will happen in about a month when the Race Track in Athens will open again.

Rotrex C30-94 New Impeller

The replacement impeller for my C30-94 came in the mail today from
www.superchargerrebuild.com

Reason for this replacement is a former mechanics big mistake to use a wide washer for the return hose (recirculation) of the bov.
Due to vibration, the washer came loose and hit the impeller a few times damaging it.It was still in good working order but I went ahead and ordered a new one for added safety.

Rotrex doesn't supply any parts , so superchargerrebuilds was the only way to go.

I will replace it tomorrow and report here.

 Update: In the last pictures you can see the new impeller installed.Big thanks to Bill from PB Motorsport for helping with this.

Pretty straight-forward to swap the parts, you might need a heat gun for the input shaft for the old impeller to come off.

Be careful not to brake the input shaft or it's bye bye Rotrex. In the final picture you can see the damaged impeller.

Κυριακή 23 Φεβρουαρίου 2014

Still here..

Well it's been quite a few years without an update..but i'm back with much more stuff to share about the MR2,the Rotrex kit and tuning with the Power FC standalone.Stay tuned for more.

Παρασκευή 12 Φεβρουαρίου 2010

Changing Springs on Coilover Suspension


After installing the Ohlins with the default setup:
Springs: Front : 5kg/mm ( 1kg/mm helper spring )
Rear : 8kg/mm ( 1kg/mm helper spring )
Sway Bars: Front : Whiteline adj/ 22mm
Rear: None

..and testing it at the track ( www.athenscircuit.gr ) i was happy with the overall feel of the car but troubled with the oversteering setup of the car..It was logical though, since the front roll rate with the sway bar (5kg/mm spring+22mm sway) was almost equal with the rear roll rate (8kg/mm spring only). And since there is more weight on the rear of the car,the rear will lose traction first.

So,without thinking it much,i ordered a pair of Hypercoil Springs (11.6kg/mm - 650 lb/in) for the front only,losing also the front sway bar:

So,the suspension characteristic from now on will be:
Springs: Front : 11.6kg/mm ( 1kg/mm helper spring )
Rear : 8kg/mm ( 1kg/mm helper spring )
Sway Bars: Front : None Rear: None

Me and my buddy(team manager :p) Sikrip decided to change them out ourselves since it is not difficult..You can see from the pictures that he did most of the work as i had the work of taking pictures..hehehe! Thanks man!

Ok,now on to the how-to:
First unscrew all the numbered bolts/nuts:

Also,remove these 3 nuts (support/hold the coilover at that time or it will fall):
After you removed all these stuff,just move the coilover in and out to let it out of the suspension knee.

Now you can start changing the spring.

Step A:
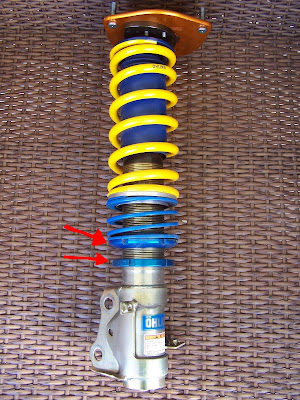
Unlock the spring seat rings using your spring perches and move them BOTH all the way down so there is no preload on the springs.If using helper springs(like I am) there will be a slight preload only on the helper but you got nothing to worry about:

Step B:
Most coilovers need an Allen key for dismantling them.Mine though, needed a Torx key T40 to be exact.Hold the top nut secure with a wrench and turn the torx till you separate the parts:

Step C:
Now you have the following parts.The body of the shock,the spring seat,a thick washer that goes between the spring seat and the top mount,the top mount and the top nut.


Take a look of the two springs:
Yellow:5kg/mm and
Blue:11.6kg/mm

Step D:
Reassembly.This goes as follows:Shock boot,helper spring with spring seat,spring,spring seat,thick washer,top mount and screw in the top nut.Then using the Torx key make sure you tighten it all up:


That's about it.On a scale of 1-10 i would say that this is a 4.

Total time for the front suspension was about 2hr with a lot of fun breaks like this one:
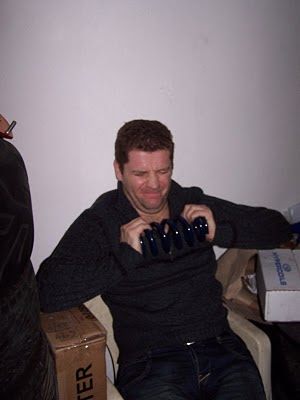
Sikrip trying to compress the 11kg spring: hahahaha

And here's me pointing out that he forgot to do something there.. :)